
Building a house is not just about bricks, cement or interior finishes. In Sri Lanka, it also comes with a set of legal steps and paperwork that no one can really skip. For many families and investors, the dream of a new home turns into a headache simply because they missed one form or misunderstood a regulation. Understanding the legal and permit requirements for house construction in Sri Lanka is essential before you dig the first hole in the ground.
This guide walks through the real-world process: the rules you’ll face, the permits you’ll need, and the delays that often catch people off guard.
Why Legal Requirements Matter Before Construction
Some people assume they can sort out the paperwork later. In practice, if you start building without proper clearance, the local authority can stop work at any stage. Worse, you could end up paying fines or, in some cases, having to demolish part of what you’ve already built.
These rules aren’t just bureaucracy for its own sake. They exist to keep the neighbourhood safe, make sure buildings don’t block public drainage, and ensure designs meet local regulatory standards. Think of them as guardrails: they can feel like a hassle, but they’re what stands between you and a house that’s actually recognised, insurable and sellable.
So before you get excited about tiles or paint colours, it’s worth mapping out the legal journey first.
Step 1: Land Title and Ownership Proof
Nothing moves without proof of land ownership. The very first thing the authorities check is whether you actually own the plot.
- Deed of ownership: This must be legally registered. Old family land often has unclear or disputed title, and that alone can delay a project for months.
- Survey plan: A government-licensed surveyor must mark the boundaries clearly. Don’t rely on verbal boundaries or what a neighbour tells you.
A common mistake is buying land without checking its history properly. Disputes, mortgages or multiple claimants can freeze construction even after you’ve already invested heavily. Always run a title check at the Land Registry before finalising the purchase.
Step 2: Development Permit
Once you own the land, you’ll need a development permit from the relevant local authority, usually the Urban Council, Municipal Council, or Pradeshiya Sabha, depending on the area.
This permit checks:
- Whether your land is zoned for residential use
- Whether your plot borders protected areas such as rivers or paddy fields
- Basic layout approval for how the house will sit on the land
Skip this step, and even a fully completed house won’t get legal recognition. That means no water connection, no electricity connection, and no resale value.
Step 3: Building Plan Approval
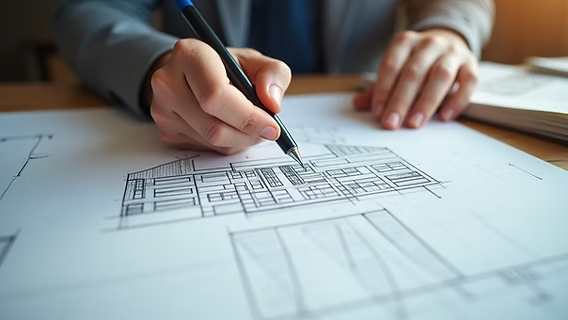
After the development permit, the next stage is the building plan. An architect or structural engineer must prepare drawings that comply with the local council’s building codes.
What the council looks at:
- Setbacks: how far the house sits from the road and from neighbouring properties
- Height restrictions: some areas cap the number of floors
- Drainage and septic systems: these must be properly designed to avoid flooding or contamination
Councils in urban areas like Colombo tend to be stricter than rural ones, but in either case, a hand-drawn sketch won’t pass. The plan has to be certified by a licensed architect or engineer.
Step 4: Environmental Clearance (When It Applies)
Not every project needs environmental clearance, but if your land is near wetlands, forests or the coastal belt, expect extra paperwork.
The Central Environmental Authority (CEA) may require:
- A report on how the construction affects natural drainage
- Proof that you’re not blocking a public waterway
- The steps you’ll take to prevent soil erosion
This is often overlooked, especially in smaller towns, until an officer raises it mid-construction. It’s worth checking early whether your site falls within an environmentally sensitive zone.
Step 5: Utility Approvals
Even with an approved building plan, you can’t live in the house without basic services. That means dealing separately with:
- The National Water Supply and Drainage Board for piped water
- The Ceylon Electricity Board (CEB) for electricity
- The local council for garbage disposal and sewage arrangements
Each of these requires its own forms, proof of building approval, and sometimes a site inspection. This step is a common source of frustration because utility boards tend to move slowly. Starting these applications early can save months.
Step 6: Construction License
Many people confuse the building plan approval with the construction license. They are not the same thing.
The construction license is what legally allows you to start digging and building. It’s issued after the building plan has been stamped and approved, so think of it as the final green light before actual work begins.
A couple of things to keep in mind:
- Licenses usually come with a time limit. If the project stalls too long, you may need to renew it.
- Some councils require proof that you’ve engaged certified masons or contractors.
Common Delays and Mistakes to Avoid
- Incomplete documents: submitting without the correct number of copies
- Using unlicensed surveyors: this leads to council rejection
- Skipping soil tests: some councils require this for multi-storey homes
- Not budgeting for fees: permit costs aren’t large individually, but ignoring them adds up and causes frustration later
One of the most common mistakes is underestimating how long approvals actually take. People often plan for two weeks; in many areas, it’s closer to two to three months. Build that timeline into your planning from the start.
The Final Certificate of Conformity (COC)
This is the last, and most critical, document in the process. The Certificate of Conformity confirms your house was built exactly according to the approved plans. Without it:
- Banks won’t lend against the property
- You can’t legally sell or rent the house
- Utility connections can be disconnected
To issue the COC, the council inspects the finished house. If they find deviations, such as an extra floor that was never approved, they can withhold it. Many homeowners try to “adjust things” during construction without going back for approval, and it usually backfires at this final stage.
Conclusion
House construction in Sri Lanka isn’t only about design or budget. It’s also about navigating a sequence of legal steps that make sure your home stands on solid ground, both legally and structurally.
The smart approach is to start with a clean title, work through each permit in order, and never try to shortcut an approval. It takes time, and the paperwork can be tedious, but it beats a stop-work order, a fine, or a property that can’t legally be sold because it doesn’t comply.
As Sri Lanka’s urbanisation continues and demand for housing grows, enforcement around compliance is only likely to get stricter. If you’re planning a dream home or an investment property, treating the legal process with the same care as the design is what actually protects the value of what you’re building.
If you’d rather not navigate this process alone, HABITAT Design and Build can guide you through permits and approvals alongside the design and construction itself. Reach us at hello@habitatsl.lk, +94 77 770 0164, or habitatsl.lk.